Discovering the Beauty of Nail Dipping Powders: My DIY Journey
Share
In my constant search for an easy, at-home nail solution that would give me professional-looking results without the hassle of salon visits, I stumbled upon nail dipping powders. I was tired of dealing with salons that often over-filed my nails, leaving my nail beds weak and damaged. I wanted to take control of my nail care and do it myself, but I had my doubts. Would it be too complicated? Could I really get salon-quality results at home?
Determined to give it a try, I did some research and watched a few videos. The Apex method, which helps create a strong, natural curve on the nail, caught my attention, so I decided to start with that. I was still nervous, but I was ready to give it a go.
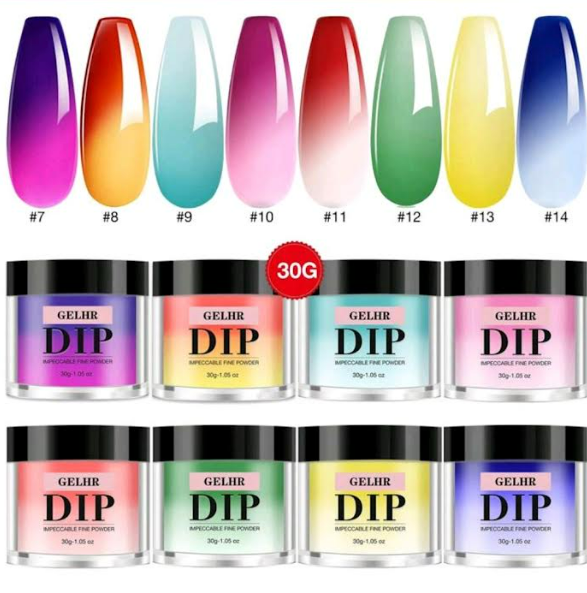
Last night, I made my first purchase: a set of temperature-changing dipping powders. The colors shift from a beautiful purple to a soft pink depending on the temperature, and I was eager to see how they worked. My kit came with everything I needed: the dipping powder, base coat, activator, and top coat.
Getting Started: The Right Hand Experience
When I began with my first hand, I chose to go with the dipping method. After applying the base coat, I dipped each nail into the powder. At first, I was excited, but I quickly noticed that the powder wasn't going on as smoothly as I hoped. The layers ended up a bit lumpy, requiring quite a bit of filing afterward. It wasn’t perfect, but I didn’t give up!
I realized that dipping can sometimes apply more powder than needed, especially for a beginner like me. While the color-changing effect was beautiful, I knew there had to be an easier way to achieve a smoother result.
The Pouring Method: A Game-Changer
For my left hand (which is always the trickier one for me, being left-handed), I decided to try the pouring method. Instead of dipping, I applied the base coat and then gently poured the powder over each nail. This made a huge difference! The powder went on much more evenly, and I didn’t have to do any filing to get a smooth finish.
I couldn’t believe how much easier this method was. The color-changing powder was just as stunning, and I felt a lot more confident in my technique. The end result was smooth, even nails with a gorgeous transition from purple to pink as the temperature changed. I was so impressed with how well they turned out, especially for my first attempt.
Dipping vs. Pouring: Find What Works for You
If you’re new to nail dipping powders like I am, don’t be afraid to experiment. The dipping method might work perfectly for some, but if you find it tricky, the pouring method is a great alternative. Both give you beautiful, long-lasting nails without the need for UV lights or salon visits.
Nail dipping powders put the power back in your hands, quite literally. They’re durable, easy to use, and give you the flexibility to try different styles and colors at home. Whether you want to try bold temperature-changing shades or classic neutrals, the process is simple once you find the method that works best for you.
If you’re considering trying it yourself, don’t hesitate! With a little practice, you’ll be doing your nails like a pro in no time.


